Stuff made out of things: Composing Components
Relentless Progress toward goals isn't always what you need
So. You’re sitting there. You have a thing. But now you wish it did a slightly different thing. But you don’t want to have to make the thing all over again.
Still with me?
Over the last week or so I’ve been working on a visual novel player and editor using React.
it's super ugly right now
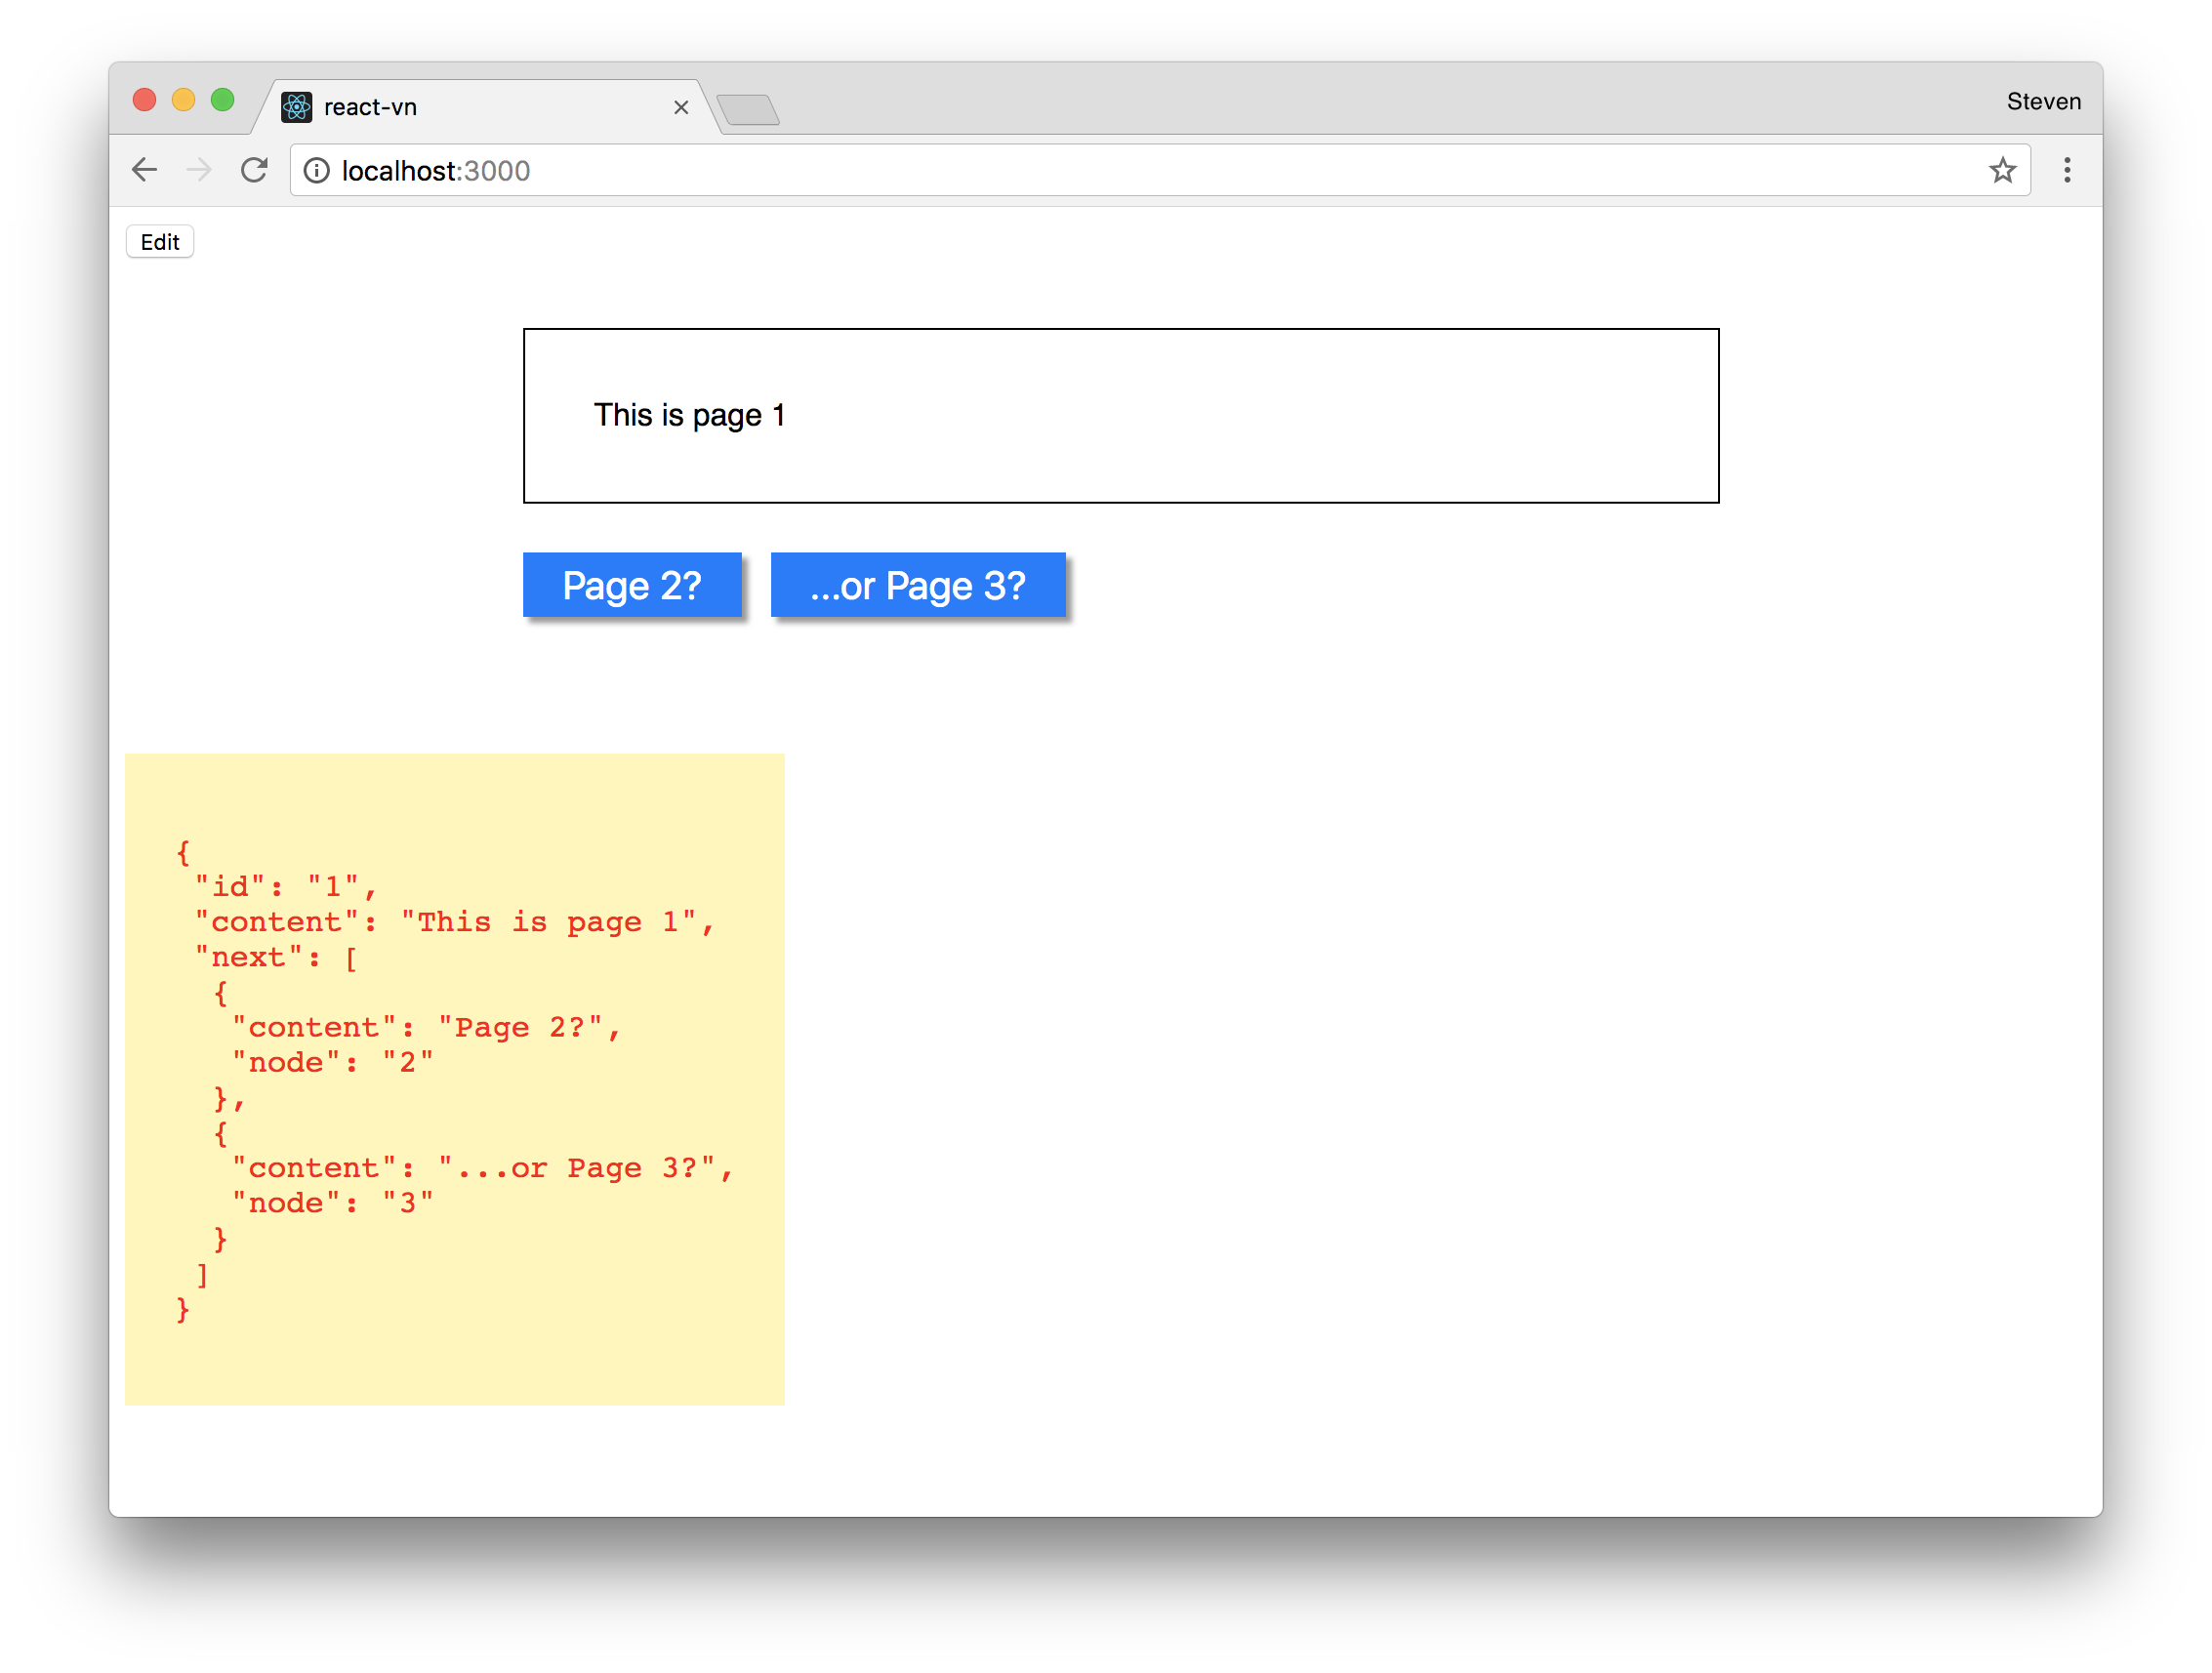
This webapp is displaying a visual novel / choose-your-own-adventure story as a series of Nodes, with links to other Nodes (I even called them NodeLinks).
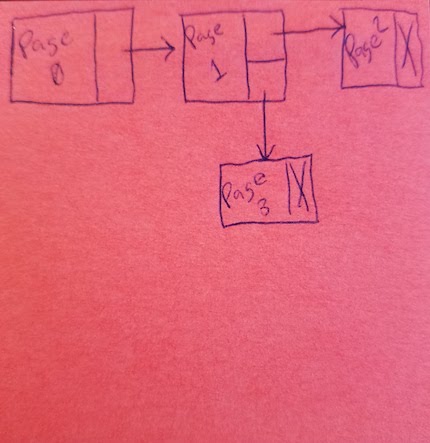
kinda like a LinkedList! (pardon the Post-it diagram)
When you click on a NodeLink, it advances to the next page, like so:
NodeLink.js
class NodeLink extends Component {
  nodeLinkClicked() {
    // remember to .bind(this) in the constructor!
    this.props.nodeLinkClicked && this.props.nodeLinkClicked(this.props.nodeLink)
  }

  render() {
    return (
      <button onClick={this.nodeLinkClicked}>
        {this.props.nodeLink.content}
      </button>
    )
  }
}
Story.js
class Story extends Component {
  goToNode(nodeLink) {
    // again, remembder to .bind(this) as well!
    this.setState({
      ...this.state,
      currentNode:this.props.storyData.nodes[nodeLink.node]
    })
  }

  render() {
    return (
      <div className="node">
        <div className="node-content">{this.state.currentNode.content}</div>
        <div className="node-links">
          {this.state.currentNode.next.map(n => <NodeLink nodeLinkClicked={this.goToNode} nodeLink={n} key={btoa(`${n.content}-${n.node}`)} />)}
        </div>
      </div>
    )
  }
}
Seems simple! But what if a NodeLink could do…more…
InputNodeLink
Commonly in these games, we want a response from the player. Whether it’s their name or what they think about a character or their favorite food.

just wanted to show off my mediocre, though homemade, pizza
I ended up thinking of this as a multistep process. First you click on a button, then you are prompted for input, then when the input is completed, the data is saved and you follow the NodeLink as usual.
So we clearly are using all of the NodeLink functionality, we just need to tack on some extra prompting functionality on top! The tiny OOP voice in my brain started screaming:
I N H E R I T A N C E
class InputNodeLink extends NodeLink {
  // new functionality here
}
But that isn’t the React™ way. It tightly couples your component to another, leaving the “source of truth” for state up in the air. Composition is a clearer way of doing this.
In this case, our InputNodeLink will be composted of a NodeLink, as well as a small prompt dialog (with an <input type="text"> and a <button> to submit).
class InputNodeLink extends Component {
  updateInput(e) {
    this.setState({
      ...this.state,
      inputValue:e.target.value
    });
  }
  render() {
    return (
      <Fragment>
        <NodeLink nodeLinkClicked={this.nodeLinkClicked} nodeLink={this.props.nodeLink} />
        { this.state.showInput && (
          <div className="input-area">
            <span className="prompt">{this.props.nodeLink.prompt}</span>
            <input type="text" onChange={this.updateInput} />
            <button onClick={this.onInputComplete}>Submit</button>
          </div>
        )}
      </Fragment>
    )
  }
}
We also get to use React 16’s new <Fragment> component to return what is actually two separate elements
So, when we pass the same props to InputNodeLink, we can build out a NodeLink with extra functionality. We are passing this.props.nodeLink on to the internal NodeLink component, and we’ve also taken InputNodeLink.nodeLinkClicked and have it acting as a go-between for the NodeLink and the Story
InputNodeLink.nodeLinkClicked
nodeLinkClicked() {
  this.setState({
    ...this.state,
    showInput:true
  })
}
This will show the input form. And when the button is clicked, it fires onInputComplete:
InputNodeLink.onInputComplete
onInputComplete(e) {
  const inputValue = this.state.inputValue
  this.setState({
    ...this.state,
    showInput:false
  }, () => this.props.nodeLinkClicked && this.props.nodeLinkClicked({...this.props.nodeLink, inputValue}))
}
Which takes the input value in the state (updated in the input onChange event), and mashes it into the nodeLink argument in nodeLinkClicked (using the ... spread operator).
At this point, Story can read the input value and save it!
Story.js
goToNode(nodeLink) {
  // nodeLink.inputValue has the new input value from InputNodeLink!
  this.setState({
    ...this.state,
    currentNode:this.props.storyData.nodes[nodeLink.node]
    inputNodeData:nodeLink.inputValue
  });
}
In real life, inputNodeData is an object that can handle an arbitrary amount of data, but for simplicity’s sake, it only stores a single variable here
There we go! We are able to extend our NodeLink component with relative ease, and slot our InputNodeLink in perfectly and with out (too much) pain.
Check out the full project at Github!
PS: render props!
Guess what, composition isn’t even the only way to get this done! “Render props” (or “Children as a function”) are an increasingly popular way of sharing code and functionality between components, where a base component allows for whatever is needed to be rendered inside of it. The child (which is a stateless component function) has access to the state of the base, and can do whatever it needs without the base component making assumptions.
There are a number of people who have waxed poetic on the advantages of render props. Here’s one! And another!
I’m still working on getting up to snuff on this new React pattern, so check back soon for an update to this on how to incorporate this into the choose your adventure app.